LDAP, the #1 way to get your graduation delayed (as has always been the meme around Tsinghua University), is every SysAdmin’s dream tool for their servers. As mighty as its rumors fly, LDAP takes the most serious dedication to set up and maintain, yet the slightest agitation to fail.
The correct story behind this opens up with our lab’s messy machine management. While home directories across machines are shared from a common NFS server, user and group information is managed manually. To start with, whenever someone joins our lab, the other admin (thankfully not yet me) creates a user for them on every machine they’d access, while paying attention to the consistency of UID and GID. What’s worse, we often grant temporary access to a selected set of machines to guest students to enable them to work on certain projects, or to participate in competitions on behalf of our lab. Not to mention the other admin himself has literally 5 different UIDs on different hosts.
LDAP solves this agony and saves a lot of sysadmins’ souls by providing centralized management to users, groups and some other organizational resources using a directory-structured database. While I previously used an existing GOsa² setup for simple management tasks, our lab’s new cluster provides an excellent opportunity to try out LDAP anew.
Prerequisites
Thanks to a network outage a few days ago, I get to reinstall our NFS server into Proxmox VE (yes again) to allow more specialized applications to be deployed in a more flexible manner. So I can just launch a new Debian Bullseye (11) virtual machine and begin this journey. The rest of this blog post assumes this environment.
Interlude: 389 Directory Server
A friend recommended Fedora’s 389 Directory Server after learning that I wanted to set up some LDAP server, indicating that it’s easier to use and maintain.
So I followed the documentation and got a 389DS up and running. Everything looked simple and straightforward until I went on configuring TLS certificates. I created a self-signed certificate with extra Subject Alternative Names (as needed) and tried to import them to 389DS. Their documentation on this is completely unhelpful, and I struggled for two tedious hours before landing on Red Hat’s documentation that actually worked. 389DS’s default “group” object doesn’t support POSIX GID, either.
All those failures led to one question: Why bother with 389DS when it still uses slapd behind? So I ditched this VM and gave it up.
Server setup
Installation is easy:
apt install slapd
This installs the OpenLDAP server with all recommended packages that’ll aid configuration. During installation, you’ll be prompted for the admin password. Ignore that for now as we’ll (probably) have to reconfigure this later.
This is because slapd tries to automatically determine the base Distinguished Name for the server, which often fails and falls back to the unpleasant dc=nodomain.
Run dpkg-reconfigure slapd to specify a domain name that will be used to construct the base DN from. It’s perfectly fine to have a short name like just ibug, or you can choose to be serious on this and use example.com. Either way, you probably don’t want to have a long DN like dc=protonlab,dc=research,dc=google,dc=com, which will make manual querying a nightmare.
Now we have an empty OpenLDAP server. The admin user’s DN is cn=admin followed by your base DN, so most data manipulation tasks require the role to be bound to cn=admin,dc=ibug for me.
The additional package ldap-utils provides tools like ldapadd, ldapmodify and ldapdelete which we’ll be mostly using later. slapd provides slapcat that dumps the whole database and ldapvi provides an interactive editor, both of which come in handy for management and debugging.
Configuring LDAP tools
All interactions with the server are done through ldap* commands submitting text in LDIF (LDAP Data Interchange Format).
Before moving on to the next step, there are config files for common settings that simplifies later tasks.
Open /etc/ldap/ldap.conf (the system-wide settings) and set these options:
BASE    dc=ibug
URI     ldapi:///
There are 3 ways to connect to an LDAP server
-
ldap://(plaintext TCP, default port 389) -
ldaps://(over SSL/TLS, default port 636) -
ldapi://(over IPC, or Unix domain socket, usually/var/run/slapd/ldapi)
Once you have this file set up, you can omit the -H <host> option from all ldap* commands. Similarly, BASE is useful in ldapsearch or like.
Populating the database
Now that we have an empty database, we can create two directories for our users and groups. This is the first LDIF file to have.
dn: ou=user,dc=ibug
objectClass: organizationalUnit
ou: user

dn: ou=group,dc=ibug
objectClass: organizationalUnit
ou: group
Use ldapadd -D cn=admin,dc=ibug -W -f base.ldif to load the “change request” into the database.
Managing users and groups
Now create the first user and group:
dn: uid=ibug,ou=user,dc=ibug
objectClass: posixAccount
objectClass: shadowAccount
objectClass: inetOrgPerson
cn: iBug
sn: iBug
uid: ibug
uidNumber: 1000
gidNumber: 1000
homeDirectory: /home/ibug
loginShell: /bin/bash
gecos: iBug

dn: cn=staff,ou=group,dc=ibug
objectClass: posixGroup
cn: staff
gidNumber: 1000
description: My staff group
For user objects, inetOrgPerson is a required “object class”, and therefore the cn and sn fields. Linux uses posixAccount and shadowAccount for authentication, and the gecos field is the one that’ll appear in output from commands like getent passwd.
To add a user to a group, use ldapmodify with this LDIF file:
dn: cn=staff,ou=group,dc=ibug
changetype: modify
add: memberUid
memberUid: ibug
Similarly, to change user information, just use replace with changetype: modify:
dn: cn=staff,ou=group,dc=ibug
changetype: modify
replace: gecos
gecos: New iBug
If you’re importing users and groups from an existing system, you may find the ability to preload the group with an initial set of users useful. When creating the group, you may supply any number of memberUids. This has the same effect as adding them one by one.
dn: cn=staff,ou=group,dc=ibug
objectClass: posixGroup
cn: staff
gidNumber: 1000
description: My staff group
memberUid: ibug
memberUid: user1
memberUid: user2
memberUid: user3
memberUid: user4
Last but not least, ldappasswd sets or resets passwords for users:
ldappasswd -D cn=admin,dc=ibug -W uid=ibug,ou=group,dc=ibug
If you don’t give the new password, ldappasswd will generate a random new one for you, which you can forward to the user themself.
Importing passwords from Linux
One great concern while migrating my lab’s authentication completely onto LDAP was whether users can keep their passwords. LDAP uses another hashing scheme SSHA by default, while any supported hashing scheme may be imported.
By default, modern Linux stores hashed user password in /etc/shadow, which is only accessible by root. It contains lines like this:
root:$y$j9T$egdUbc2x4FiVY42xxEH4z.$OJA25VwJ2fIEZizIqUDkS/yUtz8z5tuRiSS3XLum/F3:19064:0:99999:7:::
The 2nd field, delimited by colons, is the hashed password in Bcrypt format. To import that into LDAP, prepend the hash with {CRYPT}, like this:
dn: uid=ibug,ou=group,dc=ibug
changetype: modify
replace: userPassword
userPassword: {CRYPT}$y$j9T$egdUbc2x4FiVY42xxEH4z.$OJA25VwJ2fIEZizIqUDkS/yUtz8z5tuRiSS3XLum/F3
It will be replaced with LDAP’s default password hash type when the user changes their password for the next time.
Now that we have our server set up and running, it’s time to configure client machines to use it.
Client setup
There are two options for clients: More commonly libnss-ldapd and libpam-ldapd are used together, or sssd if you’re familiar with it (which will not be described in this post). Note that are two obsolete packages libnss-ldap and libpam-ldap (both missing the final d) that might confuse you.
Start with apt install libnss-ldapd libpam-ldapd. You’ll be asked for the LDAP server and the base DN, then “name services to configure”. Select passwd group shadow for now.
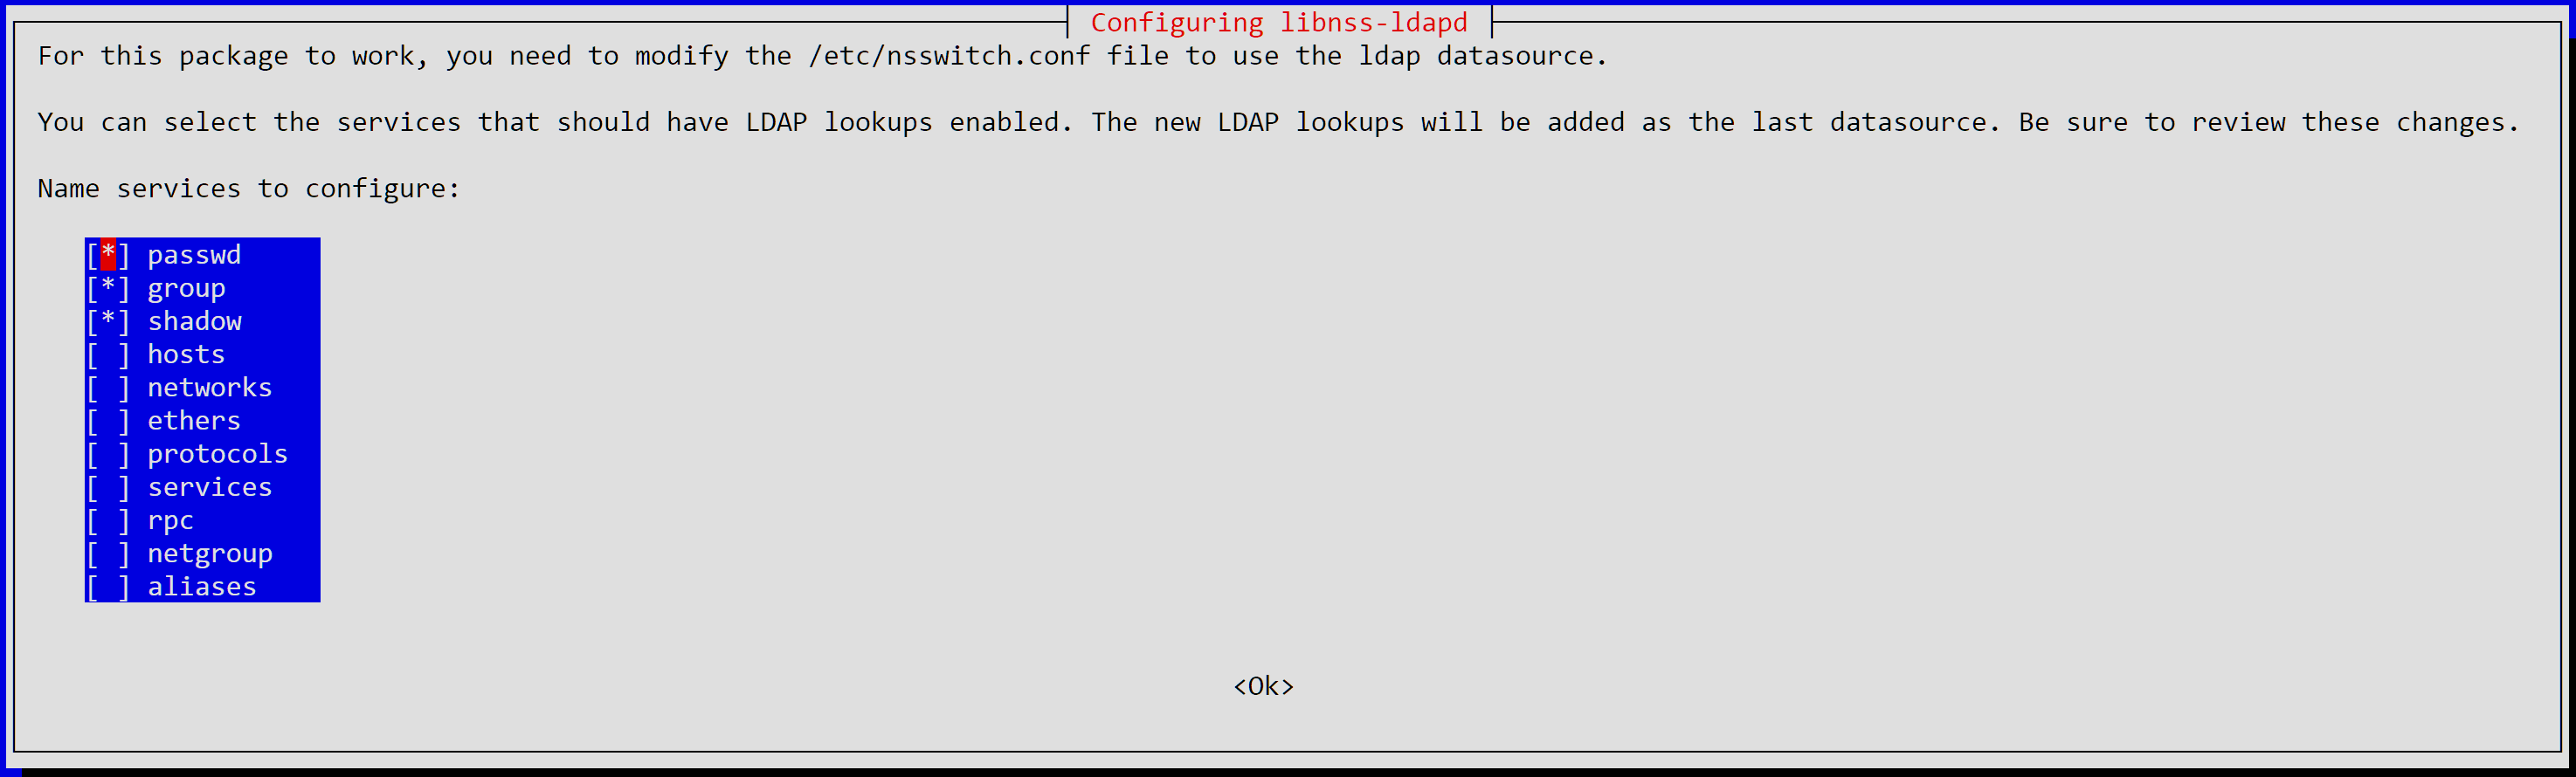
These two packages should also pull in nscd (Name Service Cache Daemon) and nslcd (Name Service LDAP Client Daemon). The former provides a local cache for name service lookup results, while the latter provides the ability to lookup items from an LDAP server.
After configuring the packages, your /etc/nslcd.conf should contain two lines that look similar to that of /etc/ldap/ldap.conf, except that the keys are in lowercase.
uri ldap://ldap.example.com
base dc=ibug
If the LDAP server is configured correctly (for nslcd), you should now be able to see LDAP users in the output of getent passwd, as well as getent group. LDAP users can also login via SSH or ttys.
An LDAP user changes their password using the same passwd command, which will be stored in LDAP and immediately available to all machines connected to this LDAP server. In case it doesn’t, nscd -i passwd and nscd -i group will refresh the cache and allow nslcd to pull in the latest information.
Advanced topics
Securing LDAP server with TLS
Nothing is “baseline secure” over unencrypted traffic, so the next thing is to add TLS certificates for the LDAP server. Certificates aren’t hard to get. For example, if you have a public domain, Let’s Encrypt is the easiest way to get a universally-trusted certificate. Otherwise, you can create a self-signed certificate that can include any domain name or IP address. XCA is one of the best tools to manage a private Certificate Authority.
Copy the certificate and private key files to the /etc/ldap/ directory. Change the owner and group to openldap and file mode to 0644 (for the certificate) or 0400 (for the private key). This ensures only the OpenLDAP server can access them. Now you need to tell the server to use these files.
dn: cn=config
changetype: modify
add: olcTLSCertificateKeyFile
olcTLSCertificateKeyFile: /etc/ldap/server.key
-
add: olcTLSCertificateFile
olcTLSCertificateFile: /etc/ldap/server.crt
-
add: olcTLSCACertificateFile
olcTLSCACertificateFile: /etc/ldap/server.crt
This time the LDAP “admin” user can’t import these changes. You need to log in to the server as root, then use the following command:
ldapmodify -Y EXTERNAL -H ldapi:/// -f ssl.ldif
“External” authentication method
The “external” authentication method defers authentication to the transport layer. There are (at least) two kinds of supported methods: Unix domain socket option SO_PEERCRED (see unix(7)) and TLS client certificate. When connecting over UDS, the server can retrieve the client’s UID, GID and PID with that option.
The -H ldapi:/// tells the ldap* commands to connect over a local Unix domain socket, which is required for -Y EXTERNAL (we don’t have TLS client certificates yet).
Order is important
The OpenLDAP documentation did not cover the detail that the private key must be added before the certificate. Otherwise you’ll get this response:
ldap_modify: Other (e.g., implementation specific) error (80)
After getting the certificates ready, we can now enable LDAP-over-TLS service. Somehow the Debian slapd package does not come with a native systemd service, but /etc/init.d/slapd, so “service settings” are configured at /etc/default/slapd. Locate that file and add ldaps:/// for SLAPD_SERVICES. Optionally, though recommended, you can remove ldap:// to disable the plaintext port. The line should now look like this:
SLAPD_SERVICES="ldaps:/// ldapi:///"
You can now use systemctl restart slapd to restart the server, and netstat -tlpn to verify that the server is listening on the correct port (TCP 636).
Managing permissions
By default,
- The “admin” user (using
-D cn=admin,dc=... -W) can modify the “database”, where users, groups etc. are stored. - The local root user can modify server settings. Namely, anything under the tree
cn=config. Note that Distinguished Name (DN) resolves from right to left, like domain names.
For me, I found it a hinderance that the root user cannot edit the database directly, so I added some permissions to make this happen.
As you may have noticed, we used the same LDIF format to change TLS settings, except for the server port. In fact, the whole cn=config tree is another LDAP database, just like the mysql database in MySQL. And this “config” database also has its metadata under cn=config.
First we identify where the metadata for the “config” database is:
ldapsearch -Y EXTERNAL -b cn=config
You can pipe the above command to less or send to a file for easier inspection. Pay attention to lines beginning with dn:, which describes a directory “node”. One of them will look like:
dn: olcDatabase={1}mdb,cn=config
The olc prefix stands for OpenLDAP Configuration, and {1} indicates an entry from multiple of the same name. You’ll probably notice there’s olcDatabase={0}config as well, which we’ll cover soon.
This item has a lot of attributes, among which there are:
dn: olcDatabase={1}mdb,cn=config
objectClass: olcDatabaseConfig
objectClass: olcMdbConfig
olcDatabase: {1}mdb
olcDbDirectory: /var/lib/ldap
olcSuffix: dc=ibug
olcAccess: {0}to attrs=userPassword by self write by anonymous auth by * none
olcAccess: {1}to attrs=shadowLastChange by self write by * read
olcAccess: {2}to * by * read
olcRootDN: cn=admin,dc=ibug
The olcAccess key(s) describes its Access Control List (ACL), and apparently {0}, {1} and {2} have the same meaning as that of olcDatabase={1}mdb. The syntax is roughly as follows:
olcAccess: {<index>}to <what> by <who> <how> [by <who> <how>]...
Notice that there’s no explicit ACL to the “admin user”, because the admin user is registered as olcRootDN for this database. The next thing we need to do is to insert an all-access rule for the local root user. The next question is, how to “refer to” the root user?
If you looked through olcDatabase={0}config, you should have the answer now:
dn: olcDatabase={0}config,cn=config
...
olcAccess: {0}to * by dn.exact=gidNumber=0+uidNumber=0,cn=peercred,cn=external,cn=auth manage by * break
...
Unfortunately LDIF does not allow modifying or inserting an item into a repeated attribute directly, so the way to do this is to replace all of them:
dn: olcDatabase={1}mdb,cn=config
changetype: modify
replace: olcAccess
olcAccess: to * by dn.exact=gidNumber=0+uidNumber=0,cn=peercred,cn=external,cn=auth manage by * break
olcAccess: to attrs=userPassword by self write by anonymous auth by * none
olcAccess: to attrs=shadowLastChange by self write by * read
olcAccess: to * by * read
Seen how the <who> part is reminiscent of the “External authentication method” described above? Send this LDIF to the server and you’ll get the desired result. You can now try to modify the “user database” using root user and -Y EXTERNAL.
To save some typing -Y EXTERNAL for ldap* commands, keep in mind that these commands read /etc/ldap/ldap.conf. This means there should be some kind of configuration for this, and indeed there is:
SASL_MECH EXTERNAL
For more detailed description, you can check out the slapd.access help page.
Allow users to change login shell
Changing the login shell is a basic privilege of a normal POSIX user. Unlike passwd that automatically handles LDAP users, chsh does not, and only complains about PAM authentication failed.
It’s easy to discover that there’s a chsh.ldap command. It’s even easier to discover that it doesn’t work:
ibug@ldap:~$ chsh.ldap
LDAP password for ibug:
Enter the new value, or press ENTER for the default
Traceback (most recent call last):
  File "/usr/bin/chsh.ldap", line 80, in <module>
    main()
  File "/usr/bin/chsh.ldap", line 69, in main
    shell = ask_shell(user.shell)
  File "/usr/bin/chsh.ldap", line 50, in ask_shell
    shell = input('  Login Shell [%s]: ' % oldshell)
UnboundLocalError: local variable 'input' referenced before assignment
If you look at /usr/bin/chsh.ldap, it contains this stupid assignment:
# Provide Python 2 compatibility
try:
    input = raw_input
except NameError:
    pass
Removing this try-except block gets rid of the first error, but it’s still not working:
ibug@ldap:~$ chsh.ldap
LDAP password for ibug:
Enter the new value, or press ENTER for the default
  Login Shell [/bin/bash]:
/usr/bin/chsh.ldap: /bin/bash is an invalid shell
The second one is trickier to fix because you don’t know where it’s doing wrong.
It took me some effort to find bug report LP#1892482, which provides a link to this commit that fixes the problem. You can safely apply that commit to your local installation of /usr/share/nslcd-utils.
Now chsh.ldap seems to be working, except that it doesn’t save your selected shell.
Remember how there’s an ACL to allow users to change their passwords?
olcAccess: {0}to attrs=userPassword by self write by anonymous auth by * none
That’s right, the only thing left to do is to add another ACL to allow users to change their login shells as well, replacing all olcAccess keys again:
dn: olcDatabase={1}mdb,cn=config
changetype: modify
replace: olcAccess
olcAccess: to * by dn.exact=gidNumber=0+uidNumber=0,cn=peercred,cn=external,cn=auth manage by * break
olcAccess: to attrs=userPassword by self write by anonymous auth by * none
olcAccess: to attrs=loginShell by self write by * none
olcAccess: to attrs=shadowLastChange by self write by * read
olcAccess: to * by * read
This time there’s no need to include by anonymous auth because who checks the login shell for authentication?
Now we can verify that chsh.ldap is working correctly:
ibug@ldap:~$ chsh.ldap
LDAP password for ibug:
Enter the new value, or press ENTER for the default
  Login Shell [/bin/bash]: /bin/zsh
ibug@ldap:~$ getent passwd | grep ibug
ibug:x:1000:1000:iBug:/home/ibug:/bin/zsh
ibug@ldap:~$
Afterword
LDAP is a powerful tool to manage a wide range of things, including hosts (like /etc/hosts) and even Sudo rules, with increasing complexity to set up. There’s also Active Directory on Windows platform that shares the same concepts and is even inter-operable with LDAP.
LDAP also supports plugins that enables automatic configuration of certain attributes, like “group membership”, where the plugin adds a corresponding memberOf for users when a member entry is created under a group. However, this plugin doesn’t work with the posixGroup object class and requires the conflicting groupOfNames object class. Fortunately, this does not affect the ability to lookup groups from users, since traditionally the user-group relationship is stored one-way only in /etc/group, and PAM by default tries to look it up this way.
If you need access control, OpenSSH supports an AllowGroup directive to restrict login to certain groups, which you can then remotely configure in LDAP.
References
- 使用 OpenLDAP 在 Linux 上进行中心化用户管理 - Harry Chen’s blog
- 9.3. Managing the NSS Database Used by Directory Server (Red Hat Documentation)
- Bcrypt - Wikipedia
- XCA
-
The commit that fixes
chsh.ldap


Leave a comment