Yesterday in a server maintenance period, we decided to tune the storage layout of our Proxmox VE server, which included disassembling a RAID 1 array and adjusting the size of the root filesystem.
Backup data
As is always, potentially destructive disk operations should be preceded with a backup of anything necessary for recovery.
Proxmox VE uses a kind of “standard” partition layout, with the first 512 MB of the primary disk allocated for the EFI System Partition (ESP), and the rest forming an LVM physical volume (PV), which then becomes a volume group (VG) named pve. In the pve VG, a fifth of total available space is allocated to the root filesystem for the Proxmox VE system, and the rest goes to a thin pool named data.
The initial disk layout on our server is like this:
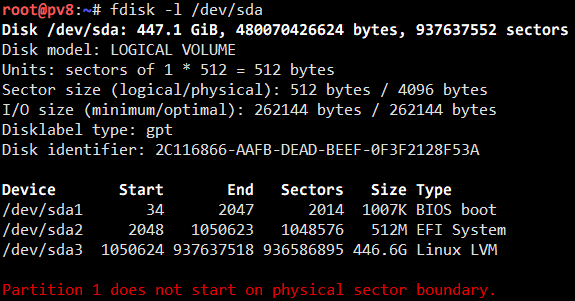
The system is booted with UEFI, so the first partition can be safely ignored. The second partition is the ESP and contains no critical data, as it can be rebuilt when needed. The only thing left for backup is the rootfs since we haven’t made use of the data volume. A good news is that the rootfs only has less then 3.5 GB of content (we have separate storages for the system and our virtual machines), so backing up is as easy as allocating a 4 GB volume on our data storage and copying the whole rootfs over with Rsync:
rsync -aHAXx / /mnt/backup/
In addition, it’s been said in this Super User answer that
Of course, it may be a complete jerk for you and wipe the drives for no good reason, but this is very unlikely.
So we might not even need that backup (in fact we didn’t). After all, it’s better safe than sorry, isn’t it?
Disassembling the RAID array
The standard procedure for this is to reboot into BIOS setup and change the settings there.
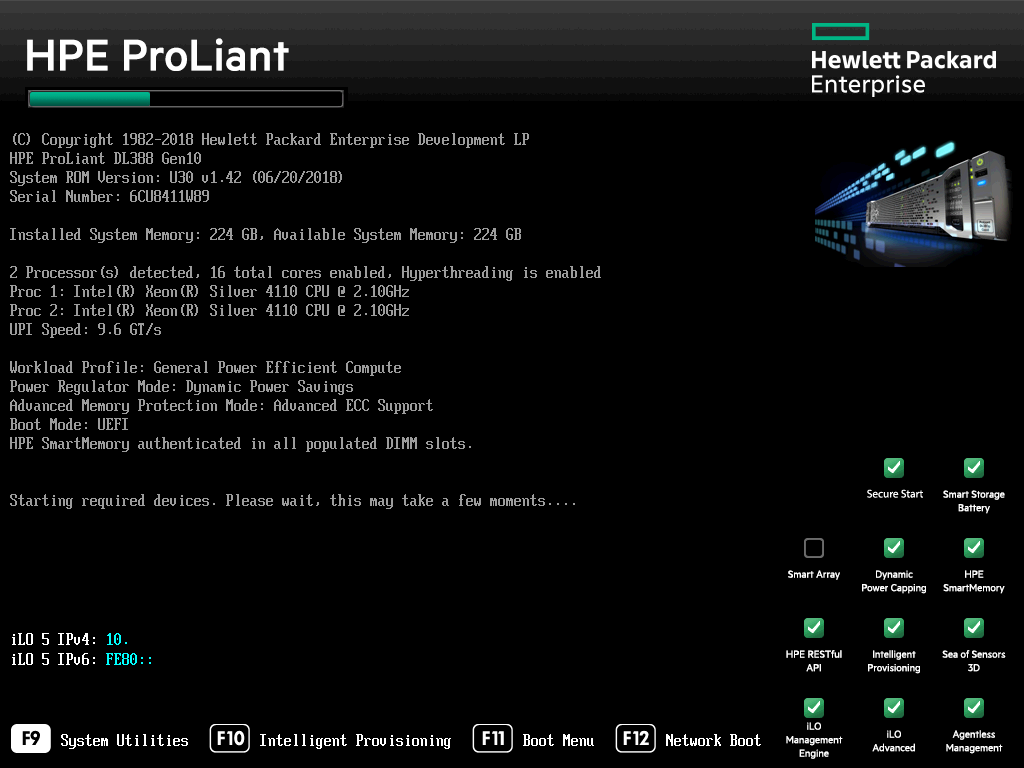
I reboot the server, hitting F9 on its POST screen.
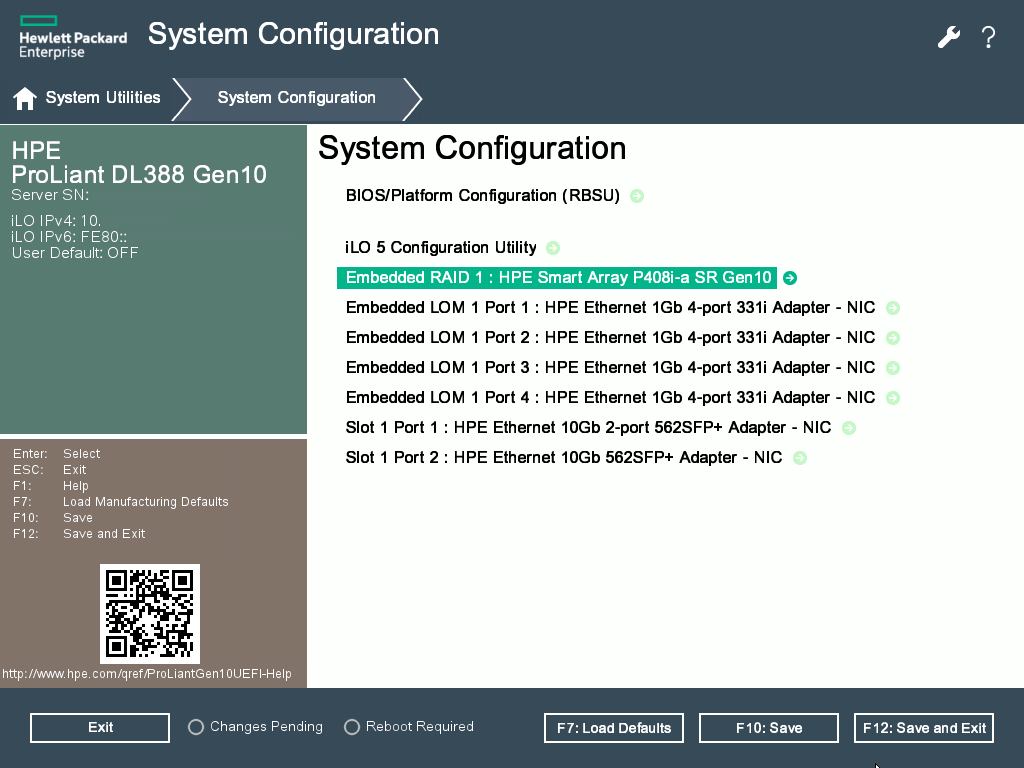
Next, I locate the built-in RAID controller. It’s called “HPE Smart Array”. I navigate into the options, locate the RAID-1 array, and select “Delete Array”. It completes just in a flash.
To ensure the changes take effect, I reboot the server again.
Restore the partition table
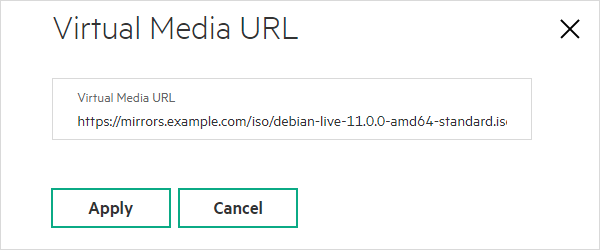
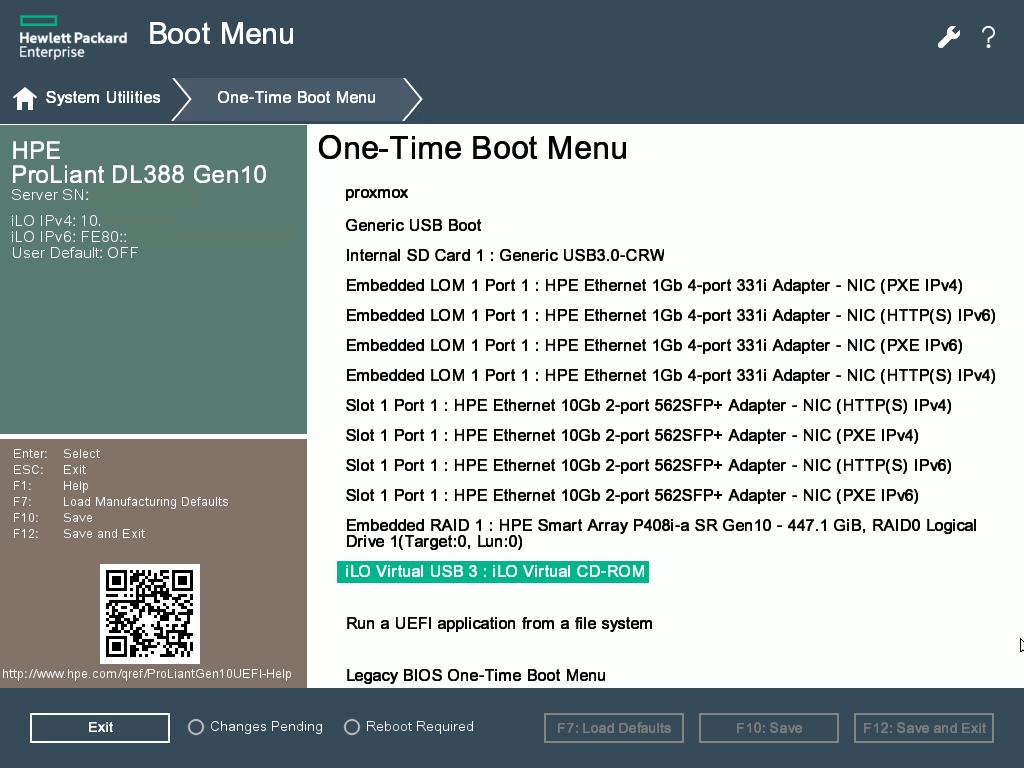
Because the disks may previously contain some RAID information at their start, their content may not be recognized now, so I insert a virtual CD-ROM drive using the “Virtual Media” feature provided by the Baseboard Management Controller (BMC, also known as IPMI). It’s good we have a file server providing these handy resources. As the host system has been updated to Proxmox VE 7, I picked the new Debian Bullseye Live CD instead of Buster. This ensures I can start the server for disk recovery jobs.
This time I enter “One-Time Boot Menu” to boot from the CD-ROM. I select “iLO Virtual CD-ROM” and it starts up.
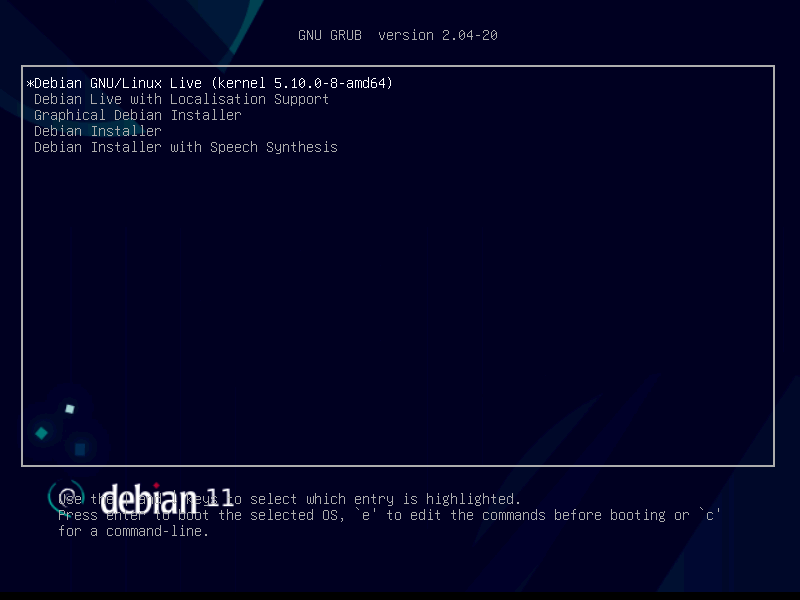
In a few seconds, the Debian boot screen shows up.
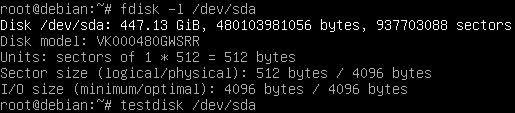
Now I can run fdisk to check the disk status. As expected, no partitions are found.
Given that the “Delete Array” operation completes so quickly, I’m sure it did nothing to data stored on the disk, so I can try recovering the partition table. testdisk is one of the utilities that do this job.
The terminal interface of testdisk is straightforward. Select the only disk given (/dev/sda, the one you gave it as CLI argument), select the previous partition table type (testdisk tells you if it can find out, which matches that in the first image of this article), and select “Analyze”.
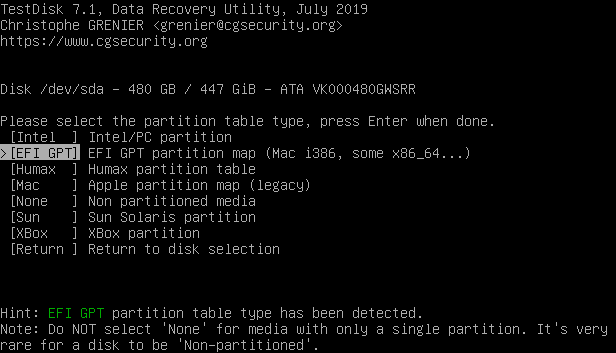
If testdisk found a partition table in the previous screen, the analyze step doesn’t need a second - it will just show the discovered partition. If it didn’t find anything, you can still run “Quick Search” and get your partition table back.
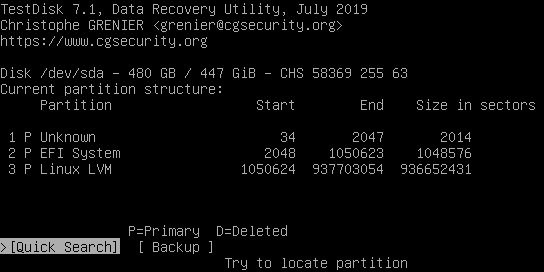
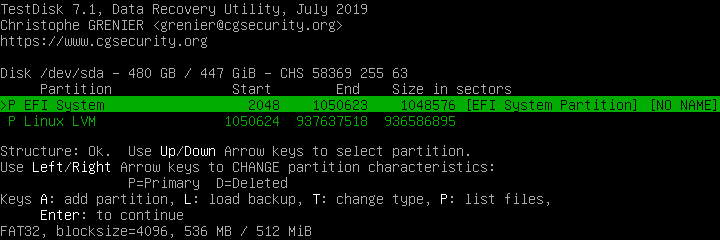
In my case, I just select “Backup” and proceed to next step. Testdisk is smart enough to discard the first nonsense partition (it’s completely redundant on a UEFI system), and I’m left with two.
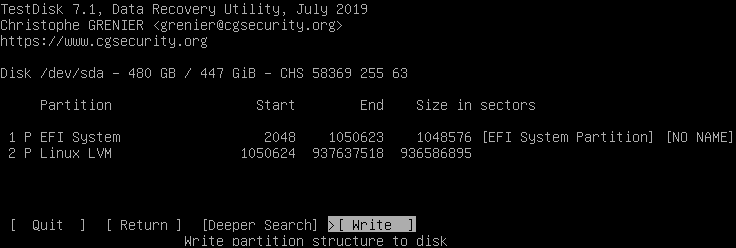
There’s no change I need to make at this stage, so I just proceed to the final screen and let testdisk write the partition table.
Although testdisk tells me “You will have to reboot for the change to take effect”, calling partprobe is all that’s necessary. Now I can confirm with fdisk that the partition table has been restored.
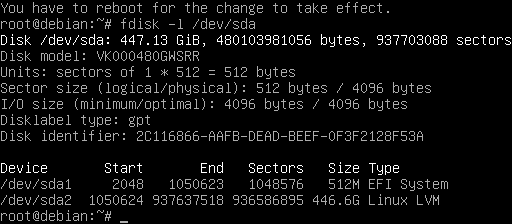
partprobe doesn’t come with Debian Bullseye live CD (it did with Debian Buster). To get the command I installed parted package.
Shrinking the root filesystem
It’s a complete waste to give the rootfs a whopping 96 GB when we only use some 3.5 GB, so I go to shrink it down to 16 GB.
Before shrinking the volume, it’s necessary to shrink the filesystem first. Yes, a “partition” and a “filesystem” are two different concepts.
The rootfs of Proxmox VE resides in LVM, so the first thing is to get LVM tools up and running. I tried apt install lvm2, and was (a bit) surprised to found that it came with Debian Bullseye Live CD.
I get back the VG pve by vgscan, and make all LVs available for operation by vgchange -ay pve. I can then mount /dev/pve/root somewhere and check the volume usage with df -h. Just around 4 gigs, we’re good.
Many years ago I read this blog by Matt Berther about shrinking EBS volumes on AWS EC2. The same solution is still applicable here (though years of Linux experience relieved me of the need for the blog as a reference).
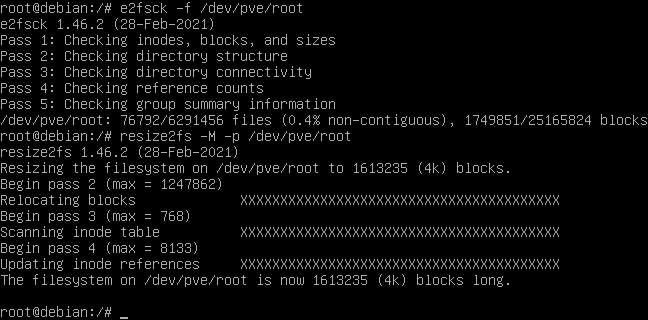
I unmount the rootfs and run e2fsck -f /dev/pve/root to ensure a clean state of the filesystem, followed by resize2fs -M -p /dev/pve/root to perform the shrinking.
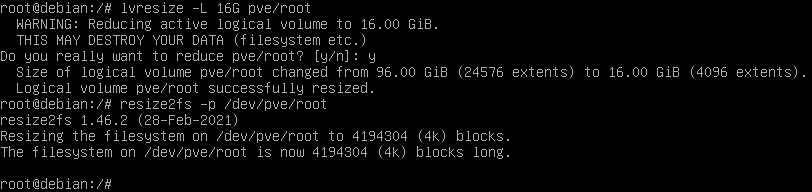
After the filesystem is shrunk, I shrink the logical volume with lvresize -L 16G pve/root. Then I grow the filesystem back to the full size of the volume with resize2fs -p /dev/pve/root (without the -M option).
Restoring rootfs to “RAID” state
The main reason we set up RAID 1 for these disks is to provide resilience against disk failures, so we can still have the system running if either disk dies. Completely breaking up the RAID array defeats this purpose, so it’s helpful to at least add the rootfs back to the mirrored state.
Luckily, LVM provides the ability to create mirrored volumes. Converting an existing one is even easier:
lvconvert -m1 pve/root
The command failed for an obvious reason: There’s only one disk in the VG.
Recalling that a RAID 1 array has just been broken up, there’s /dev/sdb with an identical partition structure available. I repeat the same steps to recover the partition table on /dev/sdb, and wiped /dev/sdb2 to avoid conflict. I can then add it to the VG as a second PV:
dd if=/dev/zero of=/dev/sdb2 bs=1M count=1
pvcreate /dev/sdb2
vgextend pve /dev/sdb2
Now I can convert the rootfs to “mirrored” volume.

The “data” volume can also be extended to take all remaining space as well:
lvextend -l +100%FREE pve/data
Fixing up GRUB
To ensure the system can boot up normally, GRUB should be updated. This needs to be done in chroot inside the original system environment. A bunch of mounts must be setup for GRUB reinstallation to work.
mount /dev/pve/root /srv

# systemd-udev requires these two directories to be available
mount -o rbind /run /srv/run
mount -o rbind /tmp /srv/tmp

chroot /srv
mount -t devtmpfs _ /dev
mount /dev/sda1 /boot/efi
mount -t proc _ /proc
mount -t sysfs _ /sys
Now I can replace grub-pc with grub-efi with apt install grub-efi, and then run grub-install on both /dev/sda1 and /dev/sdb1 so that both disks are bootable.
Fixing up ramdisk
Save yourself some hassle
This paragraph tells a trap I encountered. If you’re following this article as a step-by-step guide, you can skip this paragraph and do this instead:
- Either install
mdadm, or - Edit
/etc/initramfs-tools/modulesand append two linesdm_raidandraid1.
After picking an action above, run update-initramfs -u -k all and you can proceed to rebooting from the live CD.
Looking at the checklist, everything should have been taken care of, so I reboot the server. The Proxmox GRUB screen passed as normal. To my surprise, the server is stuck at Loading initial ramdisk.
To display more information for troubleshooting, I reboot the server again, pressing e on the GRUB screen so I can edit the boot item. I remove quiet and added nomodeset to the kernel command line (see Ask Ubuntu), and hit Ctrl-X to boot. This does turn up something useful:
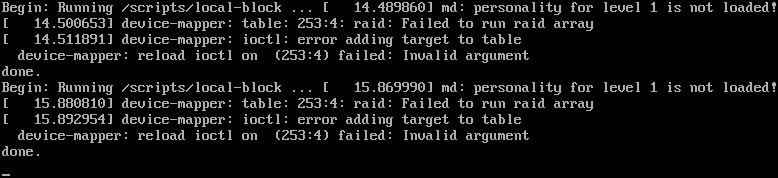
Google search for “raid: failed to run raid array” brings me to this Ask Ubuntu question. Checking the answers and the comments, I reboot again into Debian Live CD, mount the rootfs, install mdadm, and update-initramfs again. The next reboot proved correct, and the Proxmox VE server is back up now.
Other stuff
At this point, this server maintenance job has been concluded. If you’re stumbling upon this article and find a mistake or have other questions, feel free to leave a comment below.

Leave a comment