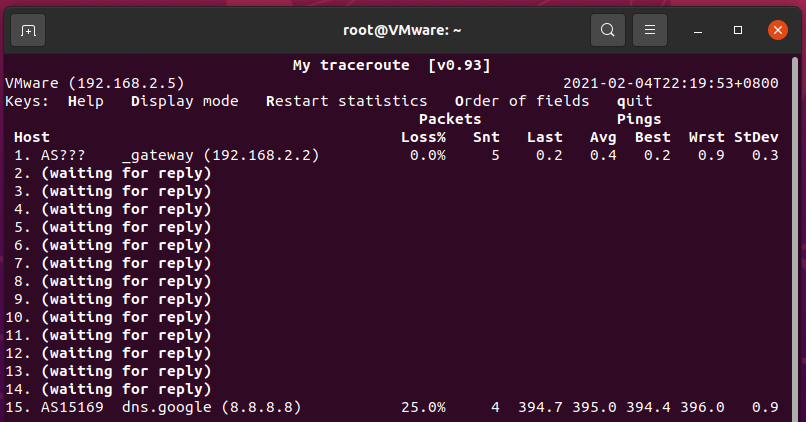
Today when I was running some networking diagnostics from an Ubuntu inside VMware Workstation, I noticed this strange result from mtr (My Traceroute):

This doesn’t look right. Googling around brought me to this page: traceroute from Ubuntu just shows first and last hops on VMPlayer 3.1.4 - VMware Technology Network VMTN
The answers in that thread mentioned two points:
- On the other hand once I switched to bridge, everything works.
- What about the intermediary requests, well the answers come back but somehow they are blocked by the Windows firewall.
I immediately realized that it’s because Windows Firewall blocked responses from the intermediate hops.
The answer
The short answer
The responses from the intermediate routers aren’t “expected” and are blocked off by Windows Firewall.
The long answer
Windows Firewall has a built-in connection tracking mechanism, similar to that of Linux (conntrack). Since mtr sends pings (ICMP Echo Requests) to the target host, Windows Firewall is expecting ICMP Echo Replies from the target host as the correct response. However, traceroute works by sending packets with TTL starting from 1 until it reaches the target host, and receiving “timed out” notices from the intermediate routers when the packet “dies from time”. This creates two discrepancies:
- The responses are ICMP Time Exceeded packets, not Echo Replies.
- The responses come from the intermediate routers, not the target host.
This unfortunately somehow “broke” the connection tracking mechanism in Windows Firewall, and leads to the responses being blocked off by Windows Firewall by default.
The solution
The short solution
Just turn off Windows Firewall entirely. You probably don’t want to or shouldn’t do this. Read on for the complete and real solution.
The correct solution to this problem is to let the intermediary responses through Windows Firewall. To actually do this, we’ll create a new firewall rule that allows ICMP Time Exceeded packets to come in. You can stop here now if you know how to configure Windows Firewall.
Step-by-step solution:
- Open Windows Defender Firewall with Advanced Security (at least it’s called as such on my Windows 10). This can be done in two ways:
- Go to Start → Windows Administrative Tools → Windows Defender Firewall with Advanced Security
- Or hit Win+R, enter
WF.mscand hit Enter.
-
Select Inbound Rules on the left and then New Rule… on the right.

-
Follow the prompt to create a new rule. Select the following options for each step. Note that the desired options are selected by default in some steps so you can simply click Next.
- Rule Type: Custom
- Program: All programs (just click Next)
- Protocol and Ports:
- Protocol type: ICMPv4
- (Optional) Internet Control Message Protocol (ICMP) settings: Click Customize → Select Specific ICMP types and tick Time Exceeded
- Scope: Any IP address for both (just click Next)
- Action: Allow (just click Next)
- Profile: Select all (just click Next)
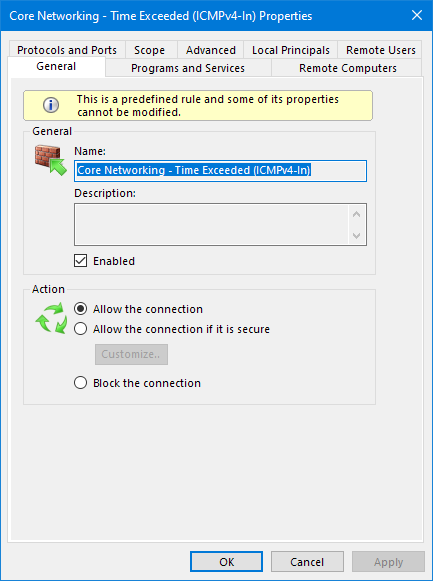
- Name: Core Networking - Time Exceeded (ICMPv4-In) (apparently just any name you prefer)
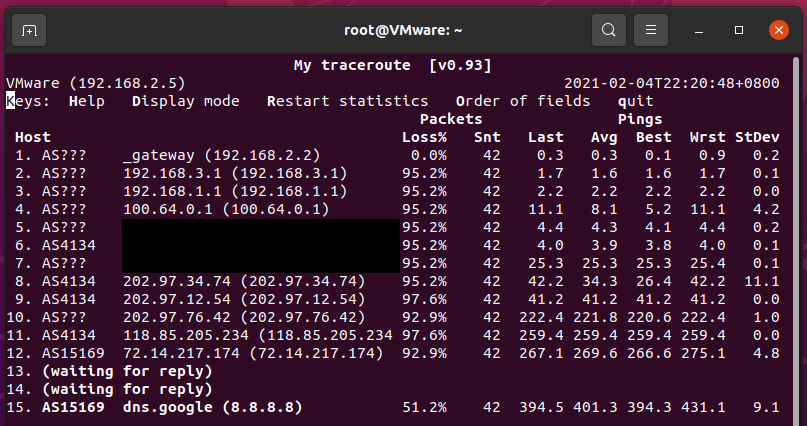
Click Finish and you should immediately see intermediate hops if you’re using
mtr. For example:
-
(Optional) Repeat the above steps but select ICMPv6 for Protocol type if you want to enable IPv6 traceroute. Don’t forget to give it a different name (e.g. (ICMPv6-In) at the end).
- In my case there’s already a built-in rule named Core Networking - Time Exceeded (ICMPv6-In) which is even enabled by default. If you find it there, you can simply enable it.
Bonus
If you want to make your rule more solid and look “canonical”, you can add it to the built-in system group Core Networking with the help of PowerShell.
$rule = Get-NetFirewallRule -DisplayName "Core Networking - Time Exceeded (ICMPv4-In)"
$rule.Group = "Core Networking"
$rule | Set-NetFirewallRule
Your new rule will look like this after running the above commands. You may need to restart the Windows Firewall window to see changes.

This article was originally written as an answer on Super User.


Leave a comment